Saturday, March 28, 2009

How-to: "Something Blue" bridal hair pin

My little sister will be getting married this summer and she trusted me enough to give me the extremely important task of designing and creating her jewelry. I'm scared already! ;O I'm almost certain, she will turn out to be my most difficult and outspoken client ever, and I'm not fooled by her when she says "Just surprise me, I'm sure I will love it!"I decided to start with hair accessories.
We went over different possibilities: hair combs, tiaras, hair bends and decided that hair pins would be best. My sister has very fine and "slippery" hair and pins will not only help to hold them in place, but also give the master hairdresser, my brother's best friend, lots of flexibility.

Supplies:
~hair pin
~wire (I'm using 26ga silver plated wire)
~beads: glass flowers, glass leaves, pearls, Swarovski crystals, seed beads go wild! use silk flowers, feathers, old jewelry, sequins, buttons, etc
~wire clippers
1. Cut an 18in long piece of wire, place first petal or leaf shaped bead in the middle of your wire and twist wire securing bead in place.
2. Secure additional 2 petal beads on each end of the wire.

3. Make a couple of additional twists below the little branches.

4. Add glass flower bead topped with "something blue" Swarovski crystal bead leaving about 1/2in of wire bellow the flower.

5. Bend the wire tightly over the edge of the flower bead and twist tightly making sure that the blue crystal stays as centered as possible.

6. Thread a little Swarovski crystal butterfly on the longer end of the wire about 1.5in from twister wire, fold it tightly against the bead and wrap around.

7. Position the butterfly above the pearl branches.

8. Add one more flower bead with Swarovski crystal center at the base of this little bridal bouquet.

9. Thread both ends of the wire through the loop of the hair pin and secure it in place by wrapping around the loop of the hair pin and around the base of the bouquet. Clip off the access wire.

Tuesday, March 24, 2009

Solar Power, going green dilemma

I always wanted a set of nice and shiny solar power panels on top of my roof, I think as far as going green goes, this it the ultimate thing, means you are serious and committed to cutting pollution. I wanted to do something that will really make a difference, but...is going green in this case really going green? Sadly...no...

While shopping in Selden Home Depot, my son Ben picked up a flyer with information on upcoming solar power seminar, which I decided to attend. Of course going anywhere means taking my two boys with me, which is extremely distracting, but I figured, I will manage it somehow, even if I have to cut the seminar short.

I was expecting a crowd when I got to the store, but turned out to be the only person who showed up. The man from GP Solar Power, explained how the system works, mentioned all requirements and figured out, which system would work best for the size of our house. The regular price of the system came up to whopping $60,000, which made me say "Wow!", but after all the discounts from LIPA, The Home Depot, state and federal government, total cost of the system would be only about $8,000. I figured it's worth considering, even though it's still a big number, but as it turned out, we would have to make some drastic changes to our property in order to go ahead with this project, which are absolutely out of the question. Each individual panel is linked to the system in such way, that if any of them happens to be shaded, the whole system is not working and isn't producing power. We would have to chop down at least four of our beautiful large oak trees growing on the edge of our property before installing solar panel system.

I love my oaks, and can't even imagine making this decision. In our case, if I have to choose between clean solar energy and oak trees, I choose oak trees!!

Thursday, March 12, 2009

Spring in pink

I think, I'm starting to sound like a broken record...and I'm not the only one;O) Winter seems particularly long and stubborn this year and we keep getting this bothersome cold weather blasts.

As we all ache for spring, every piece created in my studio seems to be influenced by this wonderful time of year, which seems to be particularly inspiring when I'm cold and can't stand wearing my winter coat any longer.

The Leaf Bouquet necklace is one of my all time favourites. This pink creation is third in this series and is made of beautifully detailed brass leaf, Swarovski crystal beads, vintage West German lucite flowers and Czech glass beads. Very delicate and feminine.


This pair of earrings was a bit of an experiment, which I think turned out super cute. I can almost hear the honey bee buzzing while collecting pollen from this beautiful vintage lucite flowers topped with antique copper bead caps and Swarovski crystal beads.

The last pair of earrings is made of antique brass finish leaf detail bead caps topping wonderfully detailed vintage inspired beads.

They can all be found in my Etsy shop

Thursday, March 5, 2009

Spring Azalea Earrings

I want spring!!!
We have been lucky with winter weather this season. While areas West and North of Long Island had plenty of "white stuff" covering the ground, warm currents helped in pushing the wintery weather away from the island. Well, at least till last Monday... We got more than 12inches of snow:O))
Well, I'm ignoring all the snow outside my studio's windows and thinking spring while working on lucite azalea earrings, and if I close my eyes, I can see them blooming in my back yard...soon, very soon...

Azalea bush blooming in our backyard in spring of 2008.

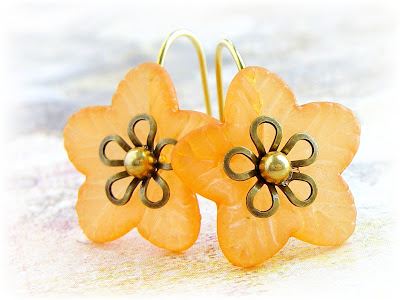
Sea Foam Azalea earrings and Tangerine Azalea earrings are already listed in my Etsy shop.

The Lemon Twist earrings as well as earrings in other beautiful spring colors will be coming soon:O)